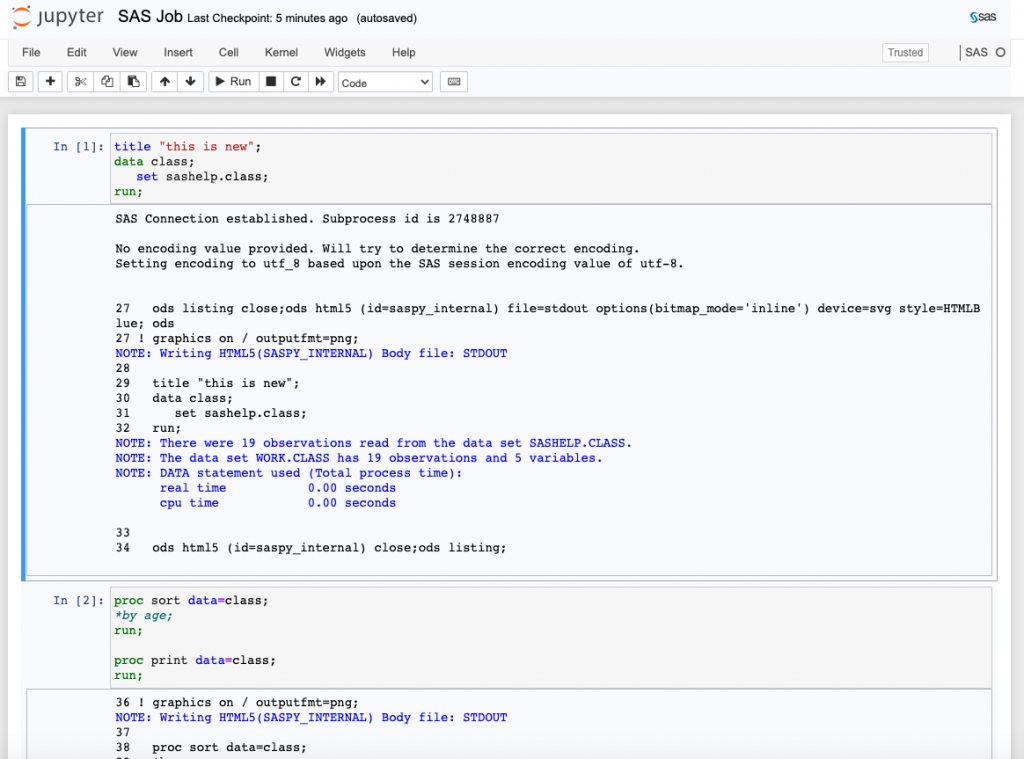
Users can run SAS interactively on the RSPH cluster through a local web browser. The interface looks like below:
Follow the steps below to set up SAS with Jupyter Notebook.
- Complete steps 1 to 3 in this tutorial written by Dr. Liuhua Shi.
- Execute the commands below in your terminal.
[jzhan61@clogin01 ~]$ conda create -n sas-env pip python=3.8

[jzhan61@clogin01 ~]$ conda activate sas-env

#You will see some error messages in this step. Ignore them.
(sas-env) [jzhan61@clogin01 ~]$ pip install sas_kernel

(sas-env) [jzhan61@clogin01 ~]$ conda install jupyter pandas -y
3. Modify the SAS kernel with the correct SAS PATH.
(sas-env) [jzhan61@clogin01 ~]$ vim ~/miniconda3/envs/sas-env/lib/python3.8/site-packages/saspy/sascfg.pyChange the ‘saspath’ variable to ‘/apps/SAS94/SASFoundation/9.4/bin/sas_u8‘ in ‘default‘, and to ‘/apps/SAS94/SASFoundation/9.4/bin/sas_en‘ in ‘ssh‘. Below is the modified content:
default  = {'saspath'  : '/apps/SAS94/SASFoundation/9.4/bin/sas_u8'
            }

ssh      = {'saspath' : '/apps/SAS94/SASFoundation/9.4/bin/sas_en',
            'ssh'     : '/usr/bin/ssh',
            'host'    : 'remote.linux.host',
            'encoding': 'latin1',
            'options' : ["-fullstimer"]
            }
Above steps only needs to be done once.
To use the SAS Jupyter kernel in the future, follow the steps below:
- Login to the cluster using
ssh -L 8999:localhost:8999 username@clogin01.sph.emory.edu
- Get an allocation
salloc -p interactive-cpu -n 1 -t 0-8:00 --mem=16000
- ssh onto the allocated node
ssh -L 8999:localhost:8999 $SLURM_JOB_NODELIST
- Activate the SAS conda environment
conda activate sas-env
- Start the Jupyter server on the cluster
jupyter notebook --NotebookApp.token='' --no-browser --port=8999
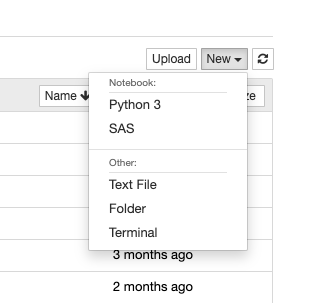
- On your local browser, open ‘
http://localhost:8999‘ and you will see the main Jupyter Notebook interface. - On the top-right corner, click on
New -> SAS. Then you will be directed to a SAS notebook.
Below is a full demonstration of activating the SAS Jupyter Notebook kernel:
Jingchao:~$ ssh -L 8999:localhost:8999 jzhan61@clogin01.sph.emory.edu

Welcome to the

██████╗ ███████╗██████╗ ██╗  ██╗
██╔══██╗██╔════╝██╔══██╗██║  ██║
██████╔╝███████╗██████╔╝███████║
██╔══██╗╚════██║██╔═══╝ ██╔══██║
██║  ██║███████║██║     ██║  ██║
╚═╝  ╚═╝╚══════╝╚═╝     ╚═╝  ╚═╝

High Performance Computing (HPC) Cluster

***  AUTHORIZED USE ONLY ***

[jzhan61@clogin01 ~]$ salloc -p interactive-cpu -n 1 -t 0-8:00 --mem=16000
salloc: Granted job allocation 21885


[jzhan61@clogin01 ~]$ ssh -L 8999:localhost:8999 $SLURM_JOB_NODELIST
Activate the web console with: systemctl enable --now cockpit.socket


[jzhan61@node24 ~]$ conda activate sas-env


(sas-env) [jzhan61@node24 ~]$ jupyter notebook --NotebookApp.token='' --no-browser --port=8999
[W 03:28:24.322 NotebookApp] All authentication is disabled.  Anyone who can connect to this server will be able to run code.
[I 03:28:24.324 NotebookApp] Serving notebooks from local directory: /home/jzhan61
[I 03:28:24.324 NotebookApp] Jupyter Notebook 6.1.4 is running at:
[I 03:28:24.324 NotebookApp] http://localhost:8999/
[I 03:28:24.324 NotebookApp] Use Control-C to stop this server and shut down all kernels (twice to skip confirmation).
Then, on local browser, open ‘http://localhost:8999‘ and you will see the main Jupyter Notebook interface.
Please contact Dr. Jingchao Zhang (jingchao.zhang@emory.edu) at BIOS if you need help setting this up.