Finally the videos I began to produce on certain aspects of the project last spring are finished and online. Subscribe to The Wari Textile Project channel on Youtube!
Here is the link https://www.youtube.com/channel/UC9QQHm61tp3GDL0B2R27tRA
Finally the videos I began to produce on certain aspects of the project last spring are finished and online. Subscribe to The Wari Textile Project channel on Youtube!
Here is the link https://www.youtube.com/channel/UC9QQHm61tp3GDL0B2R27tRA
One of the great things about the climate of parts of the Andes is that many of their ancient textiles and textile tools have survived. Archaeologists have even found whole looms set up with uncompleted textiles which may have been buried with their owners. At the Carlos Museum, there are a number of artifacts which give us information about the tools weavers used and today I am going to explore one of them.
This is a basket which contains spinning and weaving tools from the Chancay culture which existed on the coast of Peru from 100-1470 CE, slightly overlapping the time period of the Wari culture.
The basket itself is made of twined plant material, kind of like the wicker baskets we use today. It was packed with everything a spinner could want as well as several balls of completed thread of different colors.
There were several spindles of various sizes, varying in thickness.
The basket also contained a small clay bowl which would have been used to balance the spindle. Cotton requires a different spinning technique than the one I am using in this project because has a much shorter staple and is subject to breaking. The weight of a drop spindle causes it to snap so cotton is often spun today in an almost identical manner, using a bowl to support a spindle with a sharp point.
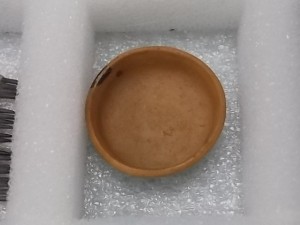
Here is a closeup of the bowl sitting inside its custom size spot in the storage tray. These two trays were made by the museum staff especially to fit this set of objects.
Cotton does not absorb color as easily as animal fibers do which makes these deep colored threads even more amazing
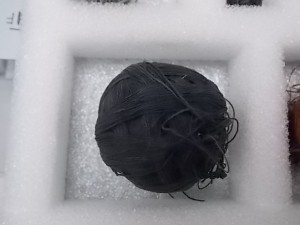
This dark navy color would have been achieved with indigo dyes. The darker the color, the more difficult it is to produce!
And this light green
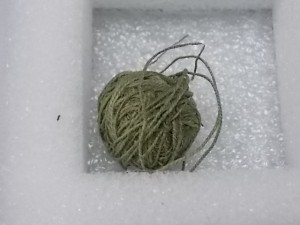
This thread is not as finely spun and you can see the twist of the two separate threads around each other.
The final tool in the basket is a bit of a puzzle to me. It is an elaborately constructed comb made by twining threads around a series of pointed slender sticks. It could have either been used as a beater, or a tool to push down the weft threads on the loom to make a tighter cloth, or as a tool to comb apart cleaned fiber to prepare it for spinning. Let me know what you think!
Here is a screenshot of our day filming demonstrations of natural dyes, here I’m looking at some indigo dye
I have received a grant to produce video footage for the project! During the next month I will be filming demonstrations of spinning, dyeing, and warping the special loom I use to weave on. These will be available on the blog via Youtube by early May.
Thanks to the Andrew W. Mellon Foundation for sponsoring this Creation Stories Project through the Emory College Center for Creativity & Art
Now that you all have some background on spinning (if you are new to the blog, see the previous post) I can begin to relate my struggles to produce quantities of quality thread. Spinning thread for the project will be an ongoing process as I will need to weave many practice pieces before getting a piece of cloth that is well made and sturdy enough to be dyed. I will also probably waste a lot of thread through mistakes.
Once I got the bugs worked out and finally started, I realized very quickly that achieving the same level of quality as the spinners who made the the thread for the Wari fragment was not too difficult for an experienced spinner.
What is extremely difficult is producing it on a consistent basis for HOURS at a time. Drop spindles are not a really efficient way of producing thread by hand so you have to spin for long periods of time. I can average an hour before my hand hurts and I have to stop. I also couldn’t maintain the level of control required for the finest thread, so some areas are uneven (with an occasional lump!)
Figuring out the process (my knowledge at this point)
Although I am an experienced spinner and used to working with a drop spindle (I have actually never learned to work a spinning wheel) I have never before tried to make the equivalent of sewing thread.
The first question I had to answer was “How thin is too thin?” One limitation on how fine your thread can be is the amount of fiber you can feed to the drop spindle without losing control of it and without it breaking.
During my own process of trial and error I discovered that the thickness of the final thread will depend on the weight of the spindle, on your hand strength, and on the fiber staple. My spindle is a little too heavy for the alpaca I am using for this project so I will have to be satisfied by a slightly thicker thread than I wanted. The fiber staple of this alpaca is also slightly longer than I would like because I have very small hands. This means that if I am drafting the fiber down to the spindle, the maximum distance I can separate fibers is about 3 inches. Because the fibers are very thin they slip past each other easily but still….
The strength of your hands is also a crucial factor, particularly your thumb and forefinger. I quickly discovered that the only way to pull a tiny bunch of fiber out of the clump I was holding in my right hand was to use my thumb nail to thin out and control the fiber my other fingers were pushing forward
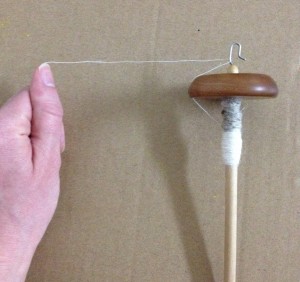
It’s hard to get good photos of spinning but here is a demonstration of the position. You have to use your thumbnail almost more than your fingers to thin out the fiber
There is also the issue not just for this project, but in drop spinning generally of how long you can spin for before the spindle hits the floor. I am a short person and since I like to spin sitting down I have to continually stop to wind the thread up which breaks your concentration. Maybe that’s why I end up with so many lumps…
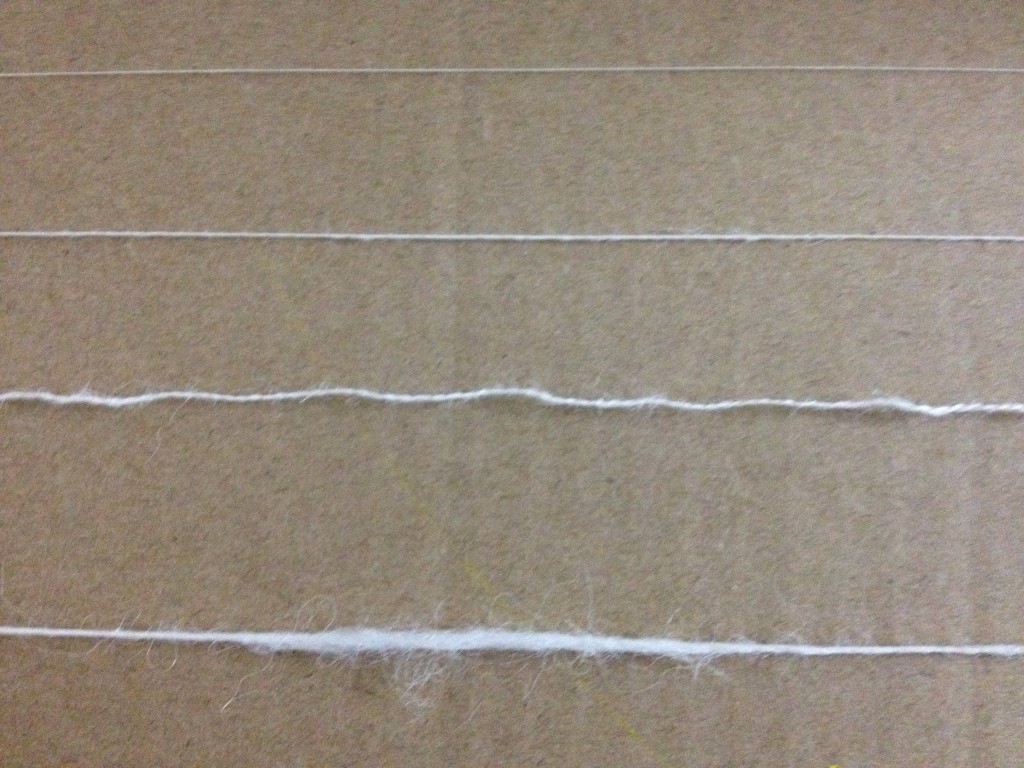
Here is a demonstration of my progress. The top thread is commercially made, the middle thread is my own thread on a good day, the third is my thread plyed (I’ll get to that in the next post) and the last is my thread on a bad day
Instead of a quiz there are two poll questions on the next page. I’ll give the answers in the next post
Thanks to the people who took the last quiz, I saw that there was something I had not done a good job phrasing!
[gallery_ids=”3″]
Thread seems like a really simple thing because we are so divorced from what it was actually like when humans had to make it. Spinning thread is the most time consuming of the entire process and is one of the reasons handspun textiles are expensive. As you can see on the “textiles for beginners” page the most basic method is using a drop spindle. These produce thread much slower than a spinning wheel so it takes even more time.
I taught myself to spin when I was about 14 from a spinning kit at bought at the Fiber Barn in the Big Eastern States Exposition (if you are from New England you know what I’m talking about, for everyone else it is a big agricultural fair for Maine, New Hampshire, Vermont, Rhode Island, Massachusetts, and Connecticut). I used merino sheep wool which is a very high grade fiber, soft and easy to spin.
I was lucky the kit came with merino because the type of fiber you use determines how easy it will be. The mechanical process of spinning with a drop spindle is that the when you spin the spindle its weight pulls down on the fibers. This causes the fibers to bind together (remember sticky proteins!). The finer and softer the fiber the easier this is. Since this fragment was part of a high prestige garment it was made out of the best stuff they had. The fact that I get to work with such good fiber is making the project much easier.
There were no sheep in the Andes until the Spanish came, so they used fiber from camelids: llamas, alpacas and two wild species called vicuñas and guanacos. Anyone who has petted llamas and alpacas probably knows that alpacas tend to have softer fur so although we can’t be sure which animal was used through tests it is usually safe to assume that the fiber in this cloth was alpaca. Even among the best type of fiber there are still levels. I used a system called a micron count to try and get the very finest and softest alpaca I could. This system is very simple, the lower the count the better the fiber. I was able to get a 15 micron count vanilla alpaca for the project.
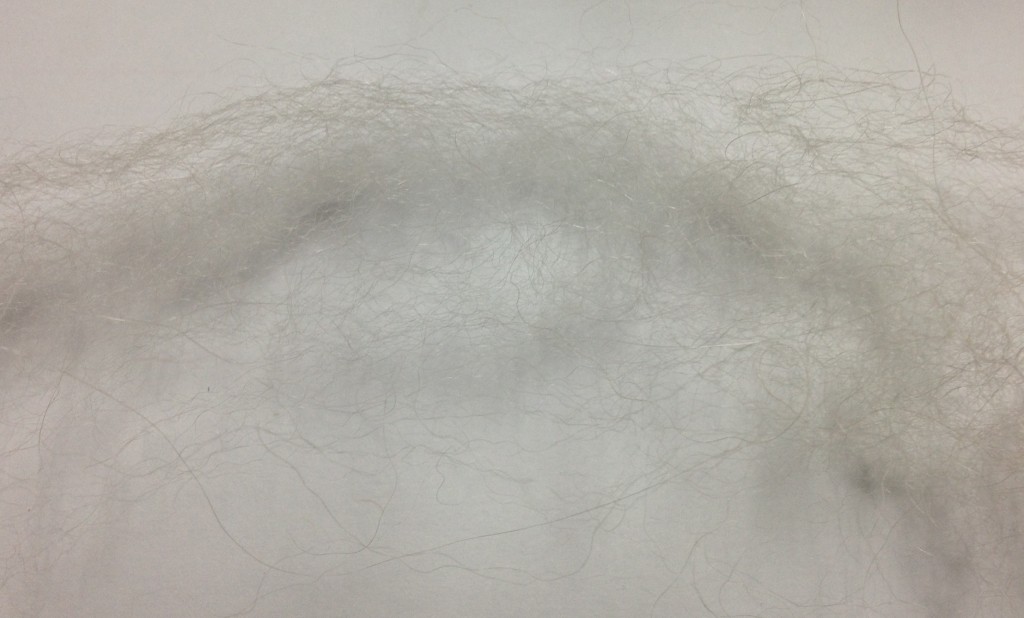
This is a sample of the alpaca fiber that I am spinning for the project
Notice the length of the fibers as opposed to the vicuña
You use your left hand (or right) to hold the clump of fiber you are trying to turn into neat thread and ideally the fingers of that hand to thin out a nice stream for the spindle to pull down.
I discovered very quickly that spinning involves the ability to do different things with each hand at once. It also means that you have to develop the muscles and coordination of you non-dominant hand which takes time. When I began spinning, I was unable to use the fingers of my left hand to separate the fibers out of the clump, a process called drafting. I would have to “park” the spindle between my legs and use both hands to thin out a length of fiber and then held that with my left while I turned the spindle with my right.
The length of the fiber, sometimes called a staple (I have no idea why) also makes a difference in how easy something is to spin. This is more of a personal preference because some people like fibers that are really long because you can spin slower but they are harder to separate. Short fibers slip through you hands faster so you have to spin quickly but they are easier to separate, at least I think so.
Alpaca is a medium length so I can just manage it in one hand and it slips through my fingers pretty easily.
If you acquire the coordination required, the act of spinning is not really that difficult. I find it incredibly meditative and soothing and have loved trying different fibers. My favorite thing to spin is actually silk which some people find difficult but I love the feel and the shine.
What is VERY difficult is actually making thread, not yarn for knitting or crocheting. Yarn is thicker and does not have to be spin as tightly. Andean people in the Pre-Hispanic period were champion spinners and were able to spin thread finer than our machine produced thread. In the Inka Empire members of a family had to spin to produce enough thread to pay their taxes. This Wari textile does not require the number of threads Inka textiles did (sometimes 6 miles of thread) and we do not know precisely how the work to produce it was divided, but the thread is still very thin. I actually didn’t believe it was plyed until I examined it under the microscope.
Test your knowledge on the next page!
There are two parts to studying an ancient textile when you are looking to understand it. The first is the obvious analysis of all the parts of the structure. The second is examining the ways the textile expresses the values and beliefs of the culture it came from. Why do I need to study the meaning if my goal is simply to recreate it? For many textile traditions in the world, but especially in the Andes, structure and meaning were (and still are) intertwined. In the ancient Andes textiles were the primary means of expression and communication. An example of this idea that may be familiar to some of you is the Inka quipus or counting strings.
Recent research (see links post) has uncovered potential ways that these strings recorded not only numbers but other ideas such as the structure of communities in two halves, upper and lower. The complex techniques like those which make up the Wari tie dye pieces developed through a similar desire to express not only social structure but spiritual beliefs. Therefore, if you only analyze the technical aspects you will not know the reason for why it was developed in the first place.
This post will focus on learning how the tie dye fragment was made. In July as a part of my Andrew Mellon internship at the Carlos museum I studied a number of textiles including the fragment. Getting a work space set up was challenging because here, as is the case in many museums, there is a real shortage of study space. I was lucky and got a table set up in a gallery space that was temporarily empty.
Here is my rather disorganized table. All objects in the museum have to be transported on carts so there is one in the background. We use special cardboard boxes that have no acid in the paper to store them in as you see here. Often the textiles are on custom size trays so we can stack them. The Wari fragment is sitting on its tray here as it is easier to move that way.
Often times textiles are sewed down to their mounts to keep them stable as this one has been. This makes it easier to make repairs
But it also restricts your ability to examine it. I couldn’t lift this up to see the back for instance or get a good look at some of the edges. There are a range of tools available to pull apart (sometimes literally!) a textile that come from a variety of sources. Very few tools are made specifically to study museum objects; I used dental tools to very gently poke into the structure of this fragment. You also have to use some form of magnification (I used the head magnifier you can see on the table).
When I evaluated this fragment to begin my replica the first thing I did was to determine the fiber and construction of the thread. The fiber was easy because we know that this fragment is from a high status garment from the mountainous region of Peru. These were usually made with llama or alpaca fiber and from looking at the thread I could tell that all the threads were one of these two. They are long and shiny which rules out cotton, the other possibility. It was also possible to see that each thread was made up of two wound together.
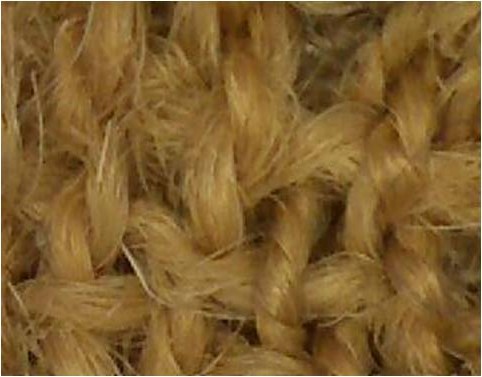
It can be hard to see if a thread is plied or not. If you look very carefully at the threads running vertically here, especially at the bottom you can see that that each is in fact two thinner threads wrapped around each other.
As you can imagine, this is very hard on your back because you are constantly leaning over the textile. It is even more difficult to get good photographs if you are not a professional photographer, which I certainly am not! I was introduced to the Proscope the during this examination which is a wonderful tool because it helps to solve both of these problems. It is a hand held microscope that you can attach to your laptop with a built in camera so it can take photographs and video footage of whatever you are looking at! All of the extremely close up photos you will see in my posts were taken with this tool. There are some limitations though. The light contained in it does not provide good lighting so the photos are somewhat dim. It also has to touch the surface so you have to be VERY careful and make sure the area you are looking at is not fragile and frayed.
This post will be continually updated with links to other sites that those of you interested in learning more about ancient American textiles, textile techniques in general, or institutions that support textile research/appreciation
This is a great video on how to do Andean ply: www.youtube.com/watch?v=M5VlaR3t_7M
This is a website for a fiber company but they provide excellent charts comparing fiber quality and discuss the pros and cons of different grades for spinning: http://www.wildfibres.co.uk/html/fibre_size.html
I have created a Zotero group of Andean textile resources: https://www.zotero.org/groups/andean_textile_resources
This website has a handy tutorial on how to spin with a bottom whorl drop spindle
If you are completely new to the world of weaving and fiber, the textiles for beginners page on the top menu will explain the foreign terms to come and many of these processes and tools will be featured in upcoming posts. There is also more information (and pictures) of the ancient textile I will be constructing in the Wari textile page. Please feel free to ask questions in the comment section as well.
The first place to start if you are going to attempt to re-create something from the past is to choose your materials and tools. I am not attempting an archaeologically correct reproduction where every single tool would be made based on existing ancient examples. Scholars have a good idea of the process as it was done in Pre-Hispanic times and thus I can explain to you all when I make modifications what would have been done instead and how much harder it was!
Fine textiles in the Andes were made out of a very high grade alpaca or vicuna (wild alpaca relative) fiber. Acceptable fiber is easy to find in online stores selling raw fiber through the micron count system (the lower the number the better the wool). I also made sure to get accurate dyes. Supplies for indigo vat dyeing, although not the exact substances used in South America are also fairly easy to find and many suppliers sell kits (http://www.aurorasilk.com/natural_dyes/indigo.html). Cochineal, the red dye, is also easy to find, though expensive.
Regarding tools, I will be spinning all of the thread required on a drop spindle as the use of spinning wheels only began in the Andes with the arrival of the Spanish. I will also be using simple frame and backstrap looms (no European rigid heddle or floor looms) that I will construct myself.
After tools comes techniques. Although I have been a spinner, weaver, and dyer for most of my life, I have never practiced many of the techniques that go into making a Wari tie dye textile. This is also complicated by the fact that there is no real record as to how these textiles were actually woven so there have been several methods developed by textile scholars in conjunction with weavers. Therefore the first steps will be to practice these techniques and do a number of tests before I start on the four pieces which will compose the final version of the fragment.
Some of these special techniques, such as Andean plying for those spinners out there are easy to find instruction on via Youtube.
Others are a little more complex and I will learn from studying the actual fragment as well as photographs of the work of weavers who have previously worked on understanding this type of textile: four selvage weaving, discontinuous warp and weft, indigo dyeing with a vat, and the tie dye technique itself.
In the next post I will walk you through the process of examining the fragment and how I was able to determine the essence of its construction.