Learning Objectives
- To learn about the process of intaglio printmaking by making small prints.
- To be able to identify the materials used in this type of printmaking
- To understand the safety measures that must be followed when etching a plate
- To appreciate how engravings are made
- To engage in a group discussion about engraving
Curricular Tie-Ins
This workshop helps students to understand one type of work that paper conservators are responsible for conserving. Students will answer the following central questions:
- How do materials and manufacture influence appearance, aging, and preservation? (For this activity, the focus is mainly on appearance)
- How do (paper) conservators make decisions?
Students will gain exposure to the process of printmaking and will learn how certain materials (ink, acid, etc.) are used in that process. Students will share materials with their peers, which will encourage group discussion and collaboration.
Supplies
- Small zinc plates (or whatever size is preferable)
- Asphaltum (to coat the zinc plates)
- Fine-pointed etching tools (anything from large needles to skewers, though preferably something durable; for carving into the asphalt)
- Protective articles such as nitrile gloves, aprons, and eyewear (especially important for individuals handling acid)
- Nitric acid
- Water
- Shallow plastic containers for soaking the plates in nitric acid solution
- Large containers with animal bedding or other highly absorbent material
- Mineral Spirits for removing asphalt from the plate surface
- Cheap cloth rags to aid in asphaltum removal
- Paper towels
- Ink (various brands can be used, and a little goes a long way!)
- Card stock (for scraping ink across the zinc plates)
- Q-tips (for dabbing ink off the zinc plates)
- Printing Paper
- Press
Steps
- Find a plate and bevel the edges
- Coat a zinc plate with asphaltum
- Etch a design into the asphaltum so that you can see some of the zinc, but do not etch into the zinc plate
- Make a nitric acid and water solution that is about 1:5- (acid to water ratio). When making the solution, add the acid to the water to prevent unnecessary chemical reactions
- Place the plate in the acid solution for 5-10 minutes (in this activity we were doing a medium to fast process). While the plate is in the solution, circulate the solution to prevent bubbles from sitting on the plate as this would cause inconsistencies in etching
- Take the plate out of the solution and wash it thoroughly with water
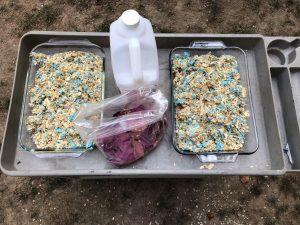
- Prepare animal bedding in a container
- In a well-ventilated area, pour mineral spirits on the plate over the container with animal bedding
- Use a cloth, animal bedding pieces, or other absorbent material to completely remove the asphalt- be careful with sharp pieces that may scratch or damage the plate
- Prepare the ink- the ink used in class was black, blue, and brown but other colors are acceptable as well
- Smooth the ink over the plate until each line is filled
- Remove excess ink from the surface- depending on how deep your incisions are you will either use a card to scrape off ink or use a Q-tip to gently wipe off areas you don’t want to be saturated with ink
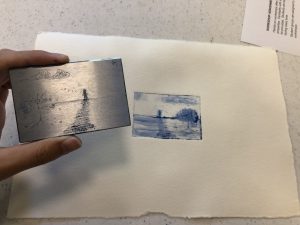
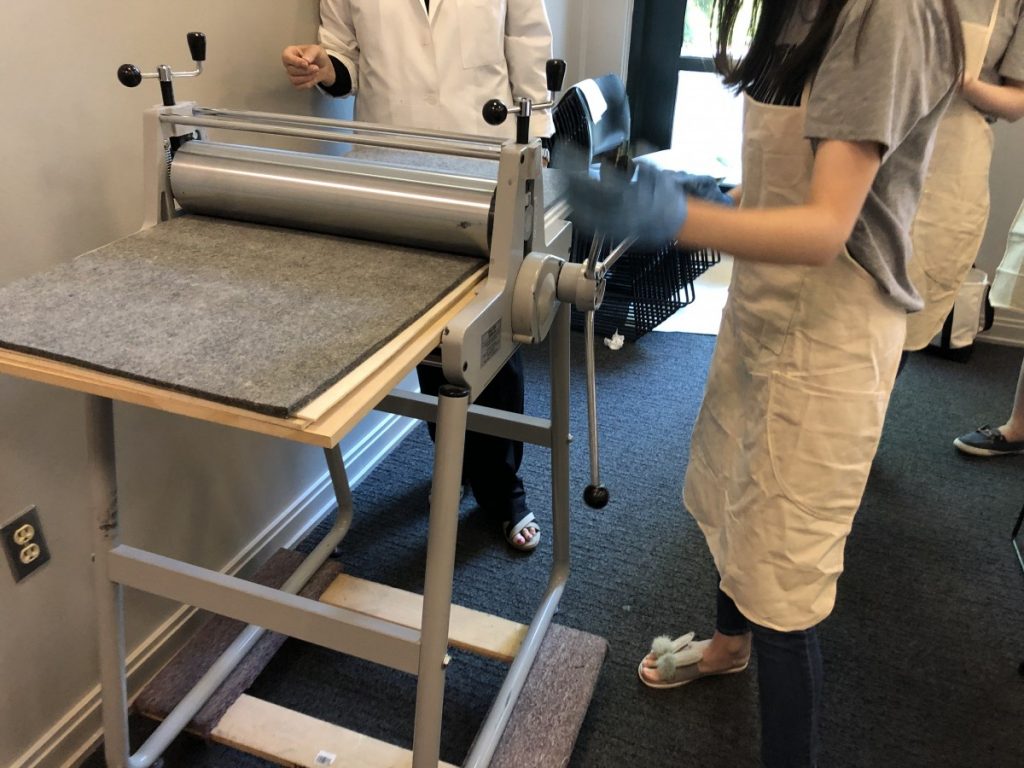
- Place the plate on a piece of paper and run the paper and plate through a press
Tips
*Wear an apron or messy clothes that you do not care about when doing this workshop.
*Have gloves and eye protection ready.
*Have metal plates already covered in asphaltum before class begins, as it will take 2-3 days to dry.
*Come up with a design before class so you are ready to start!
*Always add acid to water! (You may use tap water )
*Rate of reaction tips: -1:5 ratio of acid to water -1:3 for faster etch (thick lines) -1:7 for slower etch (delicate lines)
*You only need to scratch through asphaltum. (the acid will etch the metal for you)
*Simple, linear/abstract designs are easier to etch.
*Shake the ink to mix the pigments as they may have settled to the bottom in storage.
*Thin lines will hold the ink better.
*To shade, make use of the cross-hatching technique.
*You can manipulate how your design will turn out by using a Q-tip to take away or add more ink to a desired area. This will create highlights and shadows, respectfully.
* Be mindful of how ink application will affect print (plate edges, plate tinting, etc.)
*Remember to have fun- even if your design didn’t come out exactly as expected!
*Helpful website: https://www.moma.org/interactives/projects/2001/whatisaprint/
Safety
- Bevel the zinc plate before etching to prevent sharp corners.
- Wear an apron or alternative clothing protection to protect against ink stains or chemical spillage.
- No rowdiness. This is a fun activity that uses potentially dangerous tools. Respect the working environment for yourself and others.
- Handle needle-tool as if they were scissors, keep the point away from bodies.
- Acid Preparation
- Identify the rinse station in case of emergency. Rinse the affected area for no less than 5 minutes.
- Wear non-porous gloves when handling acid or acid-soaked plates.
- Add the acid INTO a water pan to avoid superheating the liquid.
- Do not ingest, inhale, or soak in the acid solution.
- Do not overexpose yourself or others to mineral spirit.
- Wear non-porous gloves while working with the mineral spirit.
- Handle in a well-ventilated area, such as the outdoors.
- Do not handle unsupervised.
- Do not ingest, inhale, or soak in the mineral spirit.